Cuisinart ICE-20 Instruction Manual: A Comprehensive Guide

Welcome! This comprehensive guide details the Cuisinart ICE-20 series, offering instructions and recipes for creating frozen desserts.
Resources are available online at cuisinart.com and via downloads from ManualsLib and Internet Archive.
Enjoy making ice cream, yogurt, and sorbet with ease!
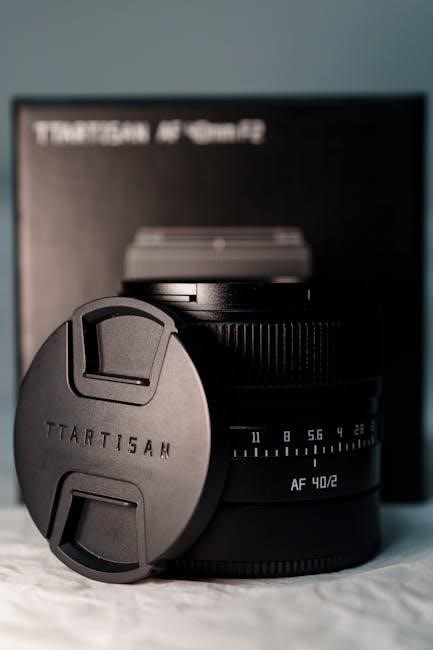
Congratulations on choosing the Cuisinart ICE-20 Automatic Frozen Yogurt, Ice Cream, and Sorbet Maker! This appliance empowers you to effortlessly create delicious frozen treats in the comfort of your own home. The ICE-20, and its variations like the ICE-20R and ICE-20C, are designed for simplicity and convenience, allowing you to enjoy fresh, homemade desserts whenever the craving strikes.
This user manual, readily available for download from resources like ManualsLib and the Internet Archive, provides a complete overview of your new appliance. It includes detailed instructions, helpful recipes, and troubleshooting tips to ensure a satisfying experience. You’ll find information on assembly, operation, cleaning, and safety precautions. The Cuisinart website (www.cuisinart.com) also offers support and additional recipes. Prepare to explore a world of frozen possibilities, from classic ice cream to refreshing sorbets and creamy frozen yogurt!
Key Features and Specifications
The Cuisinart ICE-20 boasts a generous 1.5-quart capacity, perfect for family-sized portions of your favorite frozen desserts. Its fully automatic operation simplifies the freezing process – simply add your ingredients, and the machine does the rest! The double-insulated freezing bowl ensures efficient cooling, requiring pre-freezing for optimal results.
Key features include a convenient mixing paddle that consistently churns ingredients for a smooth texture, and a user-friendly design for easy operation and cleanup. Nutritional information for sample recipes, like chocolate sauce, is often included in accompanying booklets, detailing calories, fat content, and other key metrics. The ICE-20 series (including ICE-20R and ICE-20A) is designed for versatility, allowing you to create a wide range of frozen treats with minimal effort. Downloadable manuals provide detailed specifications and usage guidelines.

Getting Started with Your ICE-20
Let’s begin! Unbox your Cuisinart ICE-20 and familiarize yourself with its components. Assembly is straightforward, ensuring a quick start to delicious homemade treats.
Unboxing and Component Identification
Carefully unpack your Cuisinart ICE-20 and verify all components are present. You should find the ice cream maker base, the 1.5-quart freezing bowl (essential for the freezing process!), the mixing paddle, and the lid with the ingredient spout.
Inspect each part for any shipping damage. The freezing bowl requires pre-freezing – typically at least 24 hours – before use, so plan accordingly. The mixing paddle is crucial for incorporating air and creating a smooth texture. Ensure the lid fits securely onto the base, allowing for easy ingredient addition during operation.
Refer to the instruction and recipe booklet (available online at cuisinart.com, ManualsLib, and the Internet Archive) for a detailed diagram identifying each component. Proper identification ensures correct assembly and optimal performance of your new ice cream maker. Don’t discard the packaging until you’re certain everything is accounted for!
Assembly Instructions: Lid and Mixing Paddle
Begin by ensuring the pre-frozen bowl is securely placed onto the ice cream maker base. Next, carefully insert the mixing paddle into the center well of the freezing bowl. It’s vital the paddle is firmly seated to effectively churn the ingredients.

Now, attach the lid. Align the lid with the base, ensuring it clicks into place. The ingredient spout on the lid is designed for adding mix-ins during the freezing process – a key feature of the ICE-20. Important: The instruction manual (available via cuisinart.com, ManualsLib, and Internet Archive) emphasizes that the mixing paddle and lid must be in place before operation.
Double-check the secure fit of both the lid and paddle. A properly assembled unit guarantees efficient operation and prevents any mishaps during the freezing cycle. Refer to the diagrams in the manual for visual guidance.

Operating Instructions
Get ready to create! The ICE-20 requires a pre-frozen bowl for optimal results. Prepare ingredients, then follow the step-by-step freezing process detailed in the manual.
Preparing the Freezing Bowl
Essential for Success: The Cuisinart ICE-20 relies on a thoroughly frozen freezing bowl to create creamy, delicious frozen desserts. Before beginning, ensure the bowl is completely clean and dry. Place the bowl in the freezer for a minimum of 16 hours – longer is often recommended, especially for initial use or in warmer climates.
Checking for Readiness: A properly frozen bowl will feel very cold to the touch and have a layer of frost forming on the exterior. If the bowl isn’t sufficiently frozen, the mixture won’t freeze correctly, resulting in a soupy consistency. It’s crucial to verify complete freezing before proceeding.
Important Note: Avoid placing anything else in the freezing bowl while it’s in the freezer, as this can impede the freezing process. Do not attempt to freeze the bowl upside down, as this can affect its performance. Consistent, proper freezing is key to enjoying perfect frozen treats with your ICE-20!
Ingredient Preparation Guidelines
Achieving Optimal Texture: For the best results with your Cuisinart ICE-20, careful ingredient preparation is vital. Recipes generally call for a liquid base – cream, milk, yogurt, or fruit puree – combined with sweeteners and flavorings. Ensure all ingredients are well chilled before combining them.
Sugar Dissolution: Thoroughly dissolve sugar into the liquid base. Undissolved sugar can result in a grainy texture in the final product. Gently warm the liquid slightly (do not boil!) to aid dissolution, then chill completely.
Fruit Considerations: When using fresh fruit, consider pureeing it before adding it to the mixture. This ensures a smoother consistency. For optimal flavor, use ripe, high-quality ingredients. Remember to consult recipe-specific instructions for precise measurements and preparation techniques.
The Freezing Process: Step-by-Step
Initiating the Freeze: Ensure the freezing bowl is thoroughly chilled – at least 24 hours in the freezer is recommended. Once chilled, lock the bowl into the Cuisinart ICE-20 base. Pour your prepared mixture into the freezing bowl; do not overfill past the maximum fill line.
Operation & Monitoring: Secure the lid with the mixing paddle correctly in place – the unit won’t operate without this. Plug in the machine and select the desired setting. The machine will initially churn vigorously, gradually thickening the mixture.
Consistency Check: Monitor the process. The freezing time varies depending on the recipe and ambient temperature, typically around 20-30 minutes. The mixture is ready when it reaches a soft-serve consistency.
Adding Mix-Ins During Freezing
Timing is Key: To incorporate mix-ins like chocolate chips, nuts, or fruit pieces, wait until the ice cream has thickened to a soft-serve consistency – usually during the last 5-10 minutes of the freezing cycle.
The Addition Process: Turn the machine off, then carefully remove the lid. Gently add your desired mix-ins, distributing them evenly throughout the ice cream. Avoid adding large quantities at once, as this can strain the motor.

Resuming the Freeze: Replace the lid securely and resume the freezing process. Allow the machine to run for a few more minutes to fully blend the mix-ins into the ice cream. Enjoy the customized flavor!

Recipes and Usage Ideas

Delicious Creations: Explore a world of frozen delights! From basic ice cream and frozen yogurt to refreshing sorbets, the ICE-20 unlocks endless possibilities.
Don’t forget the chocolate sauce recipe on page 12!
Basic Ice Cream Recipes
Vanilla Bean Ice Cream: Begin with 2 cups of heavy cream, 1 cup of whole milk, ¾ cup of sugar, and 1 vanilla bean (split and scraped). Heat gently, stirring until sugar dissolves. Cool completely, then chill for at least 4 hours. Pour into the frozen bowl and churn according to operating instructions.
Classic Chocolate Ice Cream: Combine 2 cups heavy cream, 1 cup whole milk, ¾ cup sugar, and ½ cup unsweetened cocoa powder. Heat gently, stirring until smooth. Add a pinch of salt. Cool, chill, and churn as above. For a richer flavor, incorporate 2 ounces of melted dark chocolate after chilling.
Strawberry Ice Cream: Puree 1 pound of fresh strawberries. Combine with 2 cups heavy cream, 1 cup whole milk, and ¾ cup sugar. Proceed with chilling and churning. Remember to adjust sugar based on strawberry sweetness. These recipes provide a foundation for experimentation!
Frozen Yogurt Recipes
Classic Vanilla Frozen Yogurt: Blend 2 cups plain yogurt (full-fat recommended), ½ cup milk, and ¾ cup sugar until smooth. Add 1 teaspoon vanilla extract. Chill thoroughly before churning in your ICE-20. For a tangier flavor, use Greek yogurt.
Strawberry Swirl Frozen Yogurt: Puree 1 cup strawberries and combine with 2 cups yogurt, ½ cup milk, and ¾ cup sugar. Churn as usual. Swirl in additional strawberry puree after churning for a vibrant presentation and intensified flavor.
Chocolate Peanut Butter Frozen Yogurt: Blend 2 cups yogurt, ½ cup milk, ¾ cup sugar, 2 tablespoons cocoa powder, and 2 tablespoons peanut butter. Chill and churn. Consider adding chopped peanuts during the last few minutes of churning for added texture. Enjoy a healthier dessert!
Sorbet and Sherbet Recipes
Lemon Sorbet: Combine 1 ½ cups water, 1 cup sugar, and the juice and zest of 4 lemons in a saucepan. Heat until sugar dissolves, then chill completely. Churn in your ICE-20 for a refreshing, tart sorbet. Adjust sugar to taste.
Raspberry Sorbet: Puree 2 cups raspberries and strain to remove seeds. Mix with 1 cup water, ¾ cup sugar, and 1 tablespoon lemon juice. Chill and churn. This vibrant sorbet is perfect for a summer treat!
Orange Sherbet: Blend 2 cups orange juice, ¾ cup sugar, and ½ cup milk or cream. Chill thoroughly before churning. Sherbet’s creamy texture comes from the dairy addition, offering a delightful contrast to the citrusy flavor. Experiment with different citrus fruits!
Chocolate Sauce Recipe (Page 12 Reference)
Rich Chocolate Sauce: This decadent sauce, detailed on page 12 of your booklet, elevates any frozen dessert. Combine ½ cup heavy cream, ¼ cup sugar, and ¼ cup unsweetened cocoa powder in a saucepan. Heat gently, stirring constantly, until smooth.
Remove from heat and stir in 2 tablespoons of butter and 1 teaspoon of vanilla extract. For a deeper flavor, add a pinch of salt. Cool slightly before drizzling over your homemade ice cream or sorbet. Nutritional information indicates approximately 330 calories, with 79 from fat.
Enjoy this simple yet luxurious addition to your Cuisinart creations! It pairs wonderfully with vanilla ice cream or raspberry sorbet, offering a delightful contrast of flavors and textures.

Maintenance and Troubleshooting
Proper care ensures longevity! Regularly clean components, referencing the manual for detailed instructions. Troubleshooting guides address common issues, maximizing your Cuisinart ICE-20 experience.
Cleaning and Care Instructions
Maintaining your Cuisinart ICE-20 is crucial for optimal performance and longevity. Always unplug the unit before cleaning. The freezing bowl must be thoroughly frozen before each use, and should be washed, dried, and re-frozen after cleaning. The lid and mixing paddle are dishwasher-safe (top rack recommended) or can be hand-washed in warm, soapy water.
Avoid abrasive cleaners or scouring pads, as these can damage the surfaces. The motor base should be wiped clean with a damp cloth; never immerse it in water. Ensure all parts are completely dry before reassembling. Regular cleaning prevents buildup and ensures hygienic operation. Refer to the instruction manual for detailed diagrams and specific cleaning recommendations. Proper care will guarantee many years of delicious frozen treats!
For stubborn residue, a mild baking soda paste can be gently applied and rinsed thoroughly. Always inspect the mixing paddle for any damage before each use.
Troubleshooting Common Issues
Experiencing problems with your Cuisinart ICE-20? If the mixture isn’t freezing, ensure the bowl was frozen for at least 24 hours and is level during operation. Verify the lid and mixing paddle are securely in place – the unit won’t run without them. A humming sound but no mixing indicates a potential issue with the paddle connection.
If the ice cream is too soft, the mixture may not have been cold enough initially, or the freezing process may need more time. Conversely, overly hard ice cream suggests over-freezing. Always consult the instruction manual for specific guidance. If issues persist, check the power supply and ensure the unit is properly assembled.
Remember to unplug the unit before attempting any troubleshooting steps. For further assistance, refer to Cuisinart’s website or contact their customer support.
Storage Recommendations
Proper storage ensures longevity for your Cuisinart ICE-20. After each use, thoroughly clean and dry all components before storing. The freezing bowl must be completely dry to prevent damage. Store the bowl in the freezer, ready for your next frozen treat – ideally, maintain a consistent freezer temperature.
The lid, mixing paddle, and outer housing should be stored in a cool, dry place, away from direct sunlight. Avoid stacking heavy items on top of the unit. Regularly check the power cord for any signs of damage.
If storing for an extended period, consider placing the components in a protective bag or container. Refer to the full instruction manual for detailed cleaning and storage guidelines to maintain optimal performance.

Safety Precautions
Read all instructions carefully! Ensure proper electrical safety and heed important warnings before operating the ICE-20. Always unplug before cleaning or storing.
Important Safety Warnings
To reduce the risk of injury, carefully read and understand all instructions before operating the Cuisinart ICE-20. This appliance is intended for household use only. Do not operate an appliance with a damaged cord or plug. Never immerse the motor base in water or other liquids.
Close supervision is necessary when the appliance is used by or near children. Avoid operating the appliance if you are feeling unwell or fatigued. Ensure the freezing bowl is completely frozen before initiating the freezing process – a partially frozen bowl can cause malfunctions.
Never attempt to disassemble or repair the appliance yourself. Contact Cuisinart customer service for assistance. Do not operate the appliance continuously for extended periods; allow it to rest as needed. Always ensure the lid and mixing paddle are securely in place before starting the machine.
Electrical Safety Guidelines
To ensure safe operation, the Cuisinart ICE-20 should be plugged into a grounded electrical outlet. Never operate the appliance with a damaged power cord or plug. Avoid using extension cords if possible; if necessary, ensure the cord is appropriately rated for the appliance’s wattage.
Do not pull or carry the appliance by the power cord. Always unplug the appliance from the outlet when not in use, before cleaning, and if any malfunction occurs. Avoid operating the appliance in damp or wet environments to prevent electrical shock.
If the power cord is damaged, it must be replaced by the manufacturer, its service agent, or similarly qualified persons to avoid hazard. Never attempt to modify the plug in any way. Ensure the voltage of your outlet matches the appliance’s specified voltage. Proper electrical safety is crucial for preventing accidents.