Welcome to the Fire Sense Outdoor Heater Manual, your guide to safe and efficient operation. This manual covers assembly, usage, and maintenance for optimal performance and longevity.
Designed to enhance your outdoor experience, this heater provides reliable warmth while ensuring safety. Follow the instructions carefully to maximize functionality and troubleshoot common issues effectively.
Whether assembling, operating, or maintaining, this manual offers clear steps and essential tips to ensure your Fire Sense heater delivers consistent heat and comfort season after season.
Overview of the Fire Sense Outdoor Heater
The Fire Sense Outdoor Heater is a freestanding patio heater designed to provide warmth and comfort in outdoor spaces. Built with durability and efficiency in mind, it features a stainless steel construction and a pyramid-style design for even heat distribution. Operating on propane, it delivers up to 40,000 BTUs, making it ideal for large outdoor areas. The heater is easy to assemble and includes a reflector to maximize heat output. Safety features such as automatic shut-off and a sturdy base ensure reliable performance. Perfect for extending outdoor living seasons, this heater combines style, functionality, and safety for a cozy outdoor experience year-round.
Key Features and Benefits of the Fire Sense Heater
The Fire Sense Heater offers a range of features that enhance outdoor comfort. Its 40,000 BTU output provides ample warmth for large spaces, while the stainless steel construction ensures durability against the elements. The pyramid design optimizes heat distribution, and the reflector maximizes efficiency. Safety features include automatic shut-off and a tip-over protection system. Easy ignition and adjustable heat settings allow for customizable comfort. The heater is portable and comes with a wheel assembly for easy mobility. Additionally, it includes a protective cover for storage during off-seasons, ensuring longevity. These features make it a practical and reliable choice for outdoor heating needs.

Safety Precautions and Warnings
Safety is paramount when using the Fire Sense Outdoor Heater. Ensure proper ventilation, avoid enclosed spaces, and keep flammable materials away. Never touch the heater after use, as surfaces remain hot. Maintain a safe distance from children and pets. Follow all instructions carefully to prevent accidents and ensure safe operation.
General Safety Information
Always prioritize safety when using the Fire Sense Outdoor Heater. Ensure proper ventilation to avoid carbon monoxide buildup. Keep flammable materials, such as curtains or leaves, at least 3 feet away. Never operate the heater in enclosed spaces like tents, garages, or homes. Avoid inhaling fumes during the first use, as initial burning of manufacturing oils may release smoke. Children and pets should be kept at a safe distance. Store propane tanks upright and secure when not in use. Follow all local regulations and manufacturer guidelines to minimize risks and ensure safe operation.
Specific Warnings for Outdoor Use
The Fire Sense Outdoor Heater is designed exclusively for outdoor use. Always place it on a stable, heat-resistant surface, away from flammable materials like leaves or furniture. Never leave the heater unattended while in operation. Avoid using it in strong winds or rain, as this can compromise safety and performance. Keep the propane tank upright and secure to prevent leaks. Do not use the heater near swimming pools or water sources, as this may pose electrical or fire hazards. Ensure the area is well-ventilated to prevent carbon monoxide buildup. Follow these guidelines to ensure safe and effective outdoor heating.
Precautions for Proper Ventilation
Proper ventilation is crucial when operating the Fire Sense Outdoor Heater to prevent carbon monoxide buildup. Ensure the heater is placed in an open, well-ventilated area, away from enclosed spaces like tents or gazebos. Avoid using the heater near windows or doors, as fumes can seep indoors. Keep the surrounding area free from obstructions to maintain airflow. If using the heater under a covered patio, ensure the space is adequately ventilated. Never operate the heater in confined areas, as this can lead to hazardous conditions. Always prioritize ventilation to ensure safe and efficient heating;

Installation and Assembly Instructions
Follow the manual carefully for safe and efficient assembly. Ensure all parts are securely attached, and the heater is properly positioned for optimal performance and stability.
Step-by-Step Assembly Guide
Begin by unpacking all components and verifying the parts list. Attach the base securely to the heater unit using the provided bolts. Ensure the base is level and stable; Next, insert the support pole into the base and tighten firmly. Align the reflector assembly over the heating element, ensuring proper alignment with the mounting brackets. Secure the reflector using the screws provided. Finally, connect the propane tank according to the instructions. Always refer to the diagrams for clarity and ensure all connections are tight. If unsure, consult a professional. Proper assembly is crucial for safe and efficient operation. Follow all safety guidelines provided in the manual.
Positioning the Heater for Optimal Use
Position the Fire Sense Outdoor Heater on a level, stable surface away from flammable materials. Ensure the area is clear of obstructions to allow proper airflow. Place the heater at least 3 feet away from any combustible objects, such as furniture or plants. Avoid positioning it under overhead structures or in enclosed spaces to prevent carbon monoxide buildup. Optimal performance is achieved in open areas with adequate ventilation. Use the heater on a heat-resistant surface to prevent damage. Always follow the manual’s guidelines for safe placement to ensure efficient heating and minimize safety risks. Proper positioning enhances both safety and effectiveness.
Connecting the Propane Tank

To connect the propane tank, first ensure the heater and tank are turned off. Attach the regulator to the propane cylinder, following the manufacturer’s instructions. Tighten the connection securely to prevent leaks. Next, attach the other end of the regulator to the heater’s inlet valve. Use a soap solution to check for leaks around the connections. Once secure, turn the propane tank’s valve slowly to allow gas to flow. Ensure the area is well-ventilated and clear of any open flames or sparks. Always follow the manual’s specific guidelines for connecting the propane tank to ensure safe and proper operation. Proper connection is crucial for efficient heating.

Operating the Fire Sense Outdoor Heater
Turn the propane valve slowly, press the igniter button to start the flame, and adjust the heat output as needed. Always monitor the burner for consistent combustion and ensure proper ventilation for safe operation.
Ignition Process and Initial Setup
Open the propane valve slowly to avoid gas buildup.
Press the igniter button firmly to light the pilot flame.
Check through the glass tube to ensure the pilot flame is steady.
Adjust the heat setting as needed using the control knob.
Allow 5-10 minutes for the heater to reach full operation.
Ensure proper ventilation and keep the area clear of flammable materials.
Always follow the manual’s instructions for a safe and efficient startup process.
Adjusting Heat Output and Settings
Adjust the heat output using the control knob located on the heater’s control panel.
Turn the knob clockwise to increase heat and counterclockwise to decrease it.
The heater features multiple heat settings, allowing you to choose the desired BTU output.
For optimal performance, ensure the propane valve is fully open before adjusting the heat.
Some models may include a remote control for convenient adjustment.
Always monitor the flame size and color to ensure proper operation.
Refer to the manual for specific instructions on adjusting settings for your model.
Never leave the heater unattended while in use.
Monitoring and Maintaining the Flame
Regularly monitor the flame to ensure safe and efficient operation.
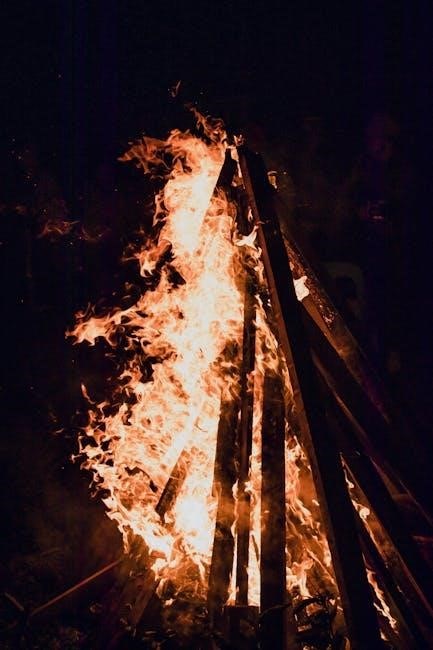
The flame should be blue and steady; a yellow or unstable flame indicates improper combustion.
Always check the pilot flame through the viewing window before and during use.
Ensure proper ventilation to prevent carbon monoxide buildup.
Never leave the heater unattended while in operation.
Turn off the heater and let it cool before performing any maintenance.
Clean the burner ports periodically to maintain airflow.
Inspect the ignition system for wear or damage.
Refer to the manual for troubleshooting guidance if the flame appears unusual or the heater malfunctions.

Maintenance and Troubleshooting
Regularly clean the burner ports and ensure proper airflow. Check for blockages and inspect the ignition system. Refer to the manual for troubleshooting common issues like uneven flames or ignition failures.
Cleaning and Upkeep Tips
Regular maintenance ensures your Fire Sense Outdoor Heater operates efficiently and safely. Clean the burner ports and surrounding areas to prevent debris buildup, which can obstruct airflow and affect performance. Inspect the ignition system and flame for proper function. Avoid exposing the heater to excessive moisture or harsh weather conditions. Use a soft cloth to wipe down surfaces, avoiding abrasive materials that may damage the finish. Never use flammable liquids or store gasoline near the heater. Ensure the propane tank is turned off when not in use. Refer to the manual for specific cleaning instructions to maintain optimal performance and longevity.
Common Issues and Solutions
Common issues with the Fire Sense Outdoor Heater include the pilot flame not lighting, uneven heat distribution, or reduced performance over time. If the pilot flame fails to ignite, check the battery in the igniter or ensure the burner ports are clear of debris. For uneven heat, adjust the reflector or ensure proper ventilation. Reduced performance may indicate a dirty burner or clogged vents, which can be resolved by cleaning according to the manual. Always turn off the propane tank when not in use to prevent leaks. Regular maintenance and inspection can prevent many issues, ensuring safe and efficient operation of your heater.
Replacing Parts and Accessories
Replacing parts and accessories for your Fire Sense Outdoor Heater ensures optimal performance and safety. Always refer to the parts diagram in the manual to identify the correct components. If the pilot flame is faulty, inspect the igniter and burner ports. For uneven heat, check the reflector alignment. If issues persist, contact Fire Sense customer support for genuine replacement parts. Avoid using non-approved components to prevent potential hazards. When replacing propane tanks, ensure they are compatible and properly secured. Regularly inspect and replace worn-out parts, such as the burner or ignition system, to maintain efficiency and safety. Follow the manual’s guidelines for proper replacement procedures.

Technical Specifications
The Fire Sense Outdoor Heater offers a powerful 40,000 BTU output, providing efficient warmth for large outdoor spaces. It operates on liquid propane gas, ensuring reliable performance in various conditions.
The heater features a durable stainless steel construction, with a pyramid design for optimal heat distribution. Its compact dimensions make it suitable for patios, decks, and gardens, while maintaining a sleek appearance.
BTU Output and Heating Capacity
The Fire Sense Outdoor Heater delivers an impressive 40,000 BTUs of heat, making it ideal for warming large outdoor areas such as patios, decks, and gardens. This robust output ensures consistent warmth even in cooler climates, creating a cozy atmosphere for gatherings or relaxation. The heater’s design maximizes heat distribution, efficiently covering spaces up to 400 square feet. With this capacity, it’s perfect for extending outdoor living seasons, providing reliable comfort throughout the year. Proper placement and ventilation are key to achieving optimal heating performance, ensuring safety and efficiency in every use.
Fuel Requirements and Efficiency
The Fire Sense Outdoor Heater operates on liquid propane gas (LPG), requiring a standard 20-pound propane tank for operation. It is designed to provide efficient heating with a fuel consumption rate that balances warmth and economy. The heater features a direct ignition system, ensuring quick and reliable startups while minimizing fuel waste. For optimal efficiency, the unit is equipped with a regulator to maintain consistent gas flow. Always use a high-quality propane tank and follow the manufacturer’s guidelines for cylinder size and pressure. Proper ventilation is essential to ensure safe and efficient operation, avoiding any buildup of fumes or reduced heating performance.
Dimensions and Weight
The Fire Sense Outdoor Heater is designed to be compact yet durable, with dimensions that allow for easy placement in various outdoor spaces. The unit weighs approximately 50 pounds, making it portable while ensuring stability. Its sleek design and balanced weight distribution prevent tipping, even in windy conditions. The heater’s dimensions are optimized for energy efficiency and heat distribution, ensuring maximum warmth with minimal footprint. Always ensure the heater is placed on a level, stable surface to maintain safety and performance. The lightweight yet sturdy construction makes it easy to relocate as needed, enhancing versatility for different outdoor settings and gatherings.
Warranty and Customer Support
The Fire Sense Outdoor Heater is backed by a comprehensive warranty. For inquiries or assistance, contact customer support at (866)985-7877, available Monday-Friday from 9 AM to 6 PM EST. Their dedicated team ensures prompt service and support, addressing any concerns effectively.
Understanding the Warranty Terms
The Fire Sense Outdoor Heater is covered by a comprehensive warranty program, ensuring protection against defects in materials and workmanship. The warranty typically covers parts and labor for a specified period, often ranging from 1 to 5 years, depending on the model and components. Registration may be required to activate the warranty, and proof of purchase is essential for claims. The warranty is exclusive and does not cover damage caused by misuse, improper installation, or failure to maintain the product as per the manual. For detailed terms, refer to the official documentation provided with your heater. Proper adherence ensures extended product lifespan and hassle-free service.
Contacting Fire Sense Customer Service
For assistance with your Fire Sense Outdoor Heater, contact their customer service team at (866) 985-7877, available Monday through Friday from 9:00 AM to 6:00 PM Eastern Standard Time. You can also reach them via fax at (904) 261-6769 or email for inquiries and support. Ensure to have your product model number and purchase details ready for efficient service. Their dedicated team is committed to addressing questions, troubleshooting issues, and providing solutions to ensure optimal use of your heater. Visit their official website for additional contact options and resources to help you make the most of your Fire Sense product.
It seems like your request got cut off. Could you please provide the complete details or clarify what you’re looking for? I’m here to help!
Final Tips for Safe and Effective Use
Always ensure the heater is placed on a stable, flat surface away from flammable materials. Keep children and pets at a safe distance to avoid accidents. Regularly inspect the heater for damage or wear, and clean it to maintain efficiency. Never leave the heater unattended while in use, and turn it off when not needed. Proper ventilation is essential to prevent carbon monoxide buildup. Store the propane tank securely when not in use. By following these guidelines, you can enjoy safe and effective heating for your outdoor gatherings and extend the lifespan of your Fire Sense Outdoor Heater.
Importance of Following the Manual
Adhering to the Fire Sense Outdoor Heater Manual is crucial for ensuring safety, optimal performance, and longevity of the appliance. Proper assembly, operation, and maintenance procedures outlined in the manual prevent potential hazards and guarantee efficient heating. Failure to follow instructions may lead to accidents, such as fires or carbon monoxide leaks. Additionally, adhering to the manual ensures compliance with local safety regulations and manufacturer guidelines. Regular maintenance and correct usage practices extend the heater’s lifespan and maintain its efficiency. By following the manual, users can enjoy a safe, reliable, and enjoyable outdoor heating experience while protecting their investment in the Fire Sense product.

About Fire Sense
Fire Sense is a trusted brand offering high-quality outdoor heating solutions. Known for durability and safety, their products provide efficient warmth and comfort in various settings.
Fire Sense as a Trusted Brand
Fire Sense has established itself as a leader in outdoor heating solutions, delivering durable and innovative products. Renowned for quality, their heaters combine style, efficiency, and safety. With a focus on customer satisfaction, Fire Sense ensures reliable performance and ease of use. Their commitment to excellence is reflected in comprehensive manuals and dedicated customer support. Whether for patios, decks, or gardens, Fire Sense heaters are designed to extend outdoor enjoyment year-round. Trusted by many, the brand prioritizes safety, energy efficiency, and user-friendly designs, making it a preferred choice for outdoor heating needs. Their reputation is built on reliability and enduring value.